
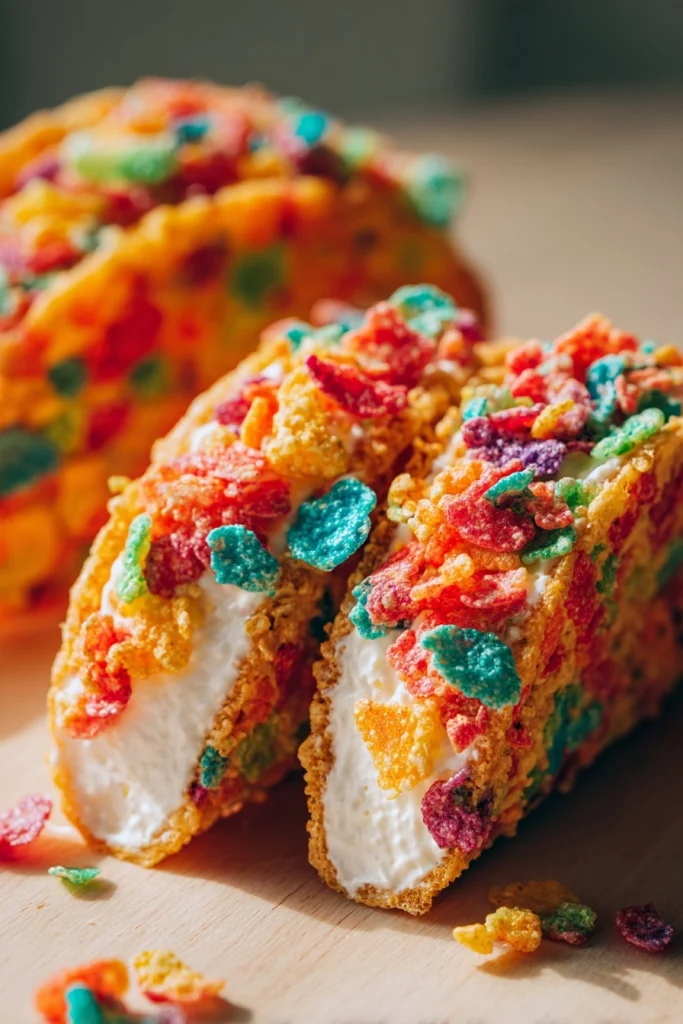
Introduction to Fruity Pebbles Cheesecake Tacos
Hey there, fellow food lovers! If you’re looking for a fun and delightful dessert that’s sure to impress, let me introduce you to Fruity Pebbles Cheesecake Tacos. These little gems are not just a feast for the eyes; they’re a quick solution for busy days when you want to whip up something special without spending hours in the kitchen. Imagine the creamy goodness of cheesecake wrapped in a crunchy taco shell, topped with colorful Fruity Pebbles. It’s a treat that brings joy to both kids and adults alike, making it perfect for family gatherings or a sweet surprise after dinner!
Why You’ll Love This Fruity Pebbles Cheesecake Tacos
These Fruity Pebbles Cheesecake Tacos are a game-changer for busy moms and professionals alike. They come together in just 15 minutes, making them a breeze to prepare. The combination of creamy cheesecake and crunchy cereal creates a delightful texture that’s hard to resist. Plus, they’re no-bake, so you can skip the oven and keep your kitchen cool. Trust me, your family will be begging for seconds!
Ingredients for Fruity Pebbles Cheesecake Tacos
Gathering the right ingredients is the first step to creating these delightful Fruity Pebbles Cheesecake Tacos. Here’s what you’ll need:
- Taco shells: The crunchy base for your cheesecake filling. You can use traditional taco shells or even mini ones for bite-sized fun.
- Cream cheese: This is the star of the show! Softened cream cheese gives the cheesecake its rich and creamy texture.
- Powdered sugar: For that perfect sweetness, powdered sugar blends smoothly into the cream cheese, making it light and fluffy.
- Vanilla extract: A splash of vanilla adds warmth and depth to the flavor, enhancing the overall taste of the cheesecake.
- Whipped cream: This ingredient lightens the mixture, creating a dreamy texture that melts in your mouth.
- Fruity Pebbles cereal: The colorful crunch that makes these tacos so fun! It adds a burst of flavor and a playful touch.
- Optional sprinkles: For an extra pop of color and fun, feel free to add sprinkles on top. They make everything more festive!
For those with dietary restrictions, you can easily swap in gluten-free taco shells. And if you want to get creative, try using different cereals or toppings to customize your tacos. The exact quantities for each ingredient are listed at the bottom of the article for your convenience!
How to Make Fruity Pebbles Cheesecake Tacos
Now that you have all your ingredients ready, let’s dive into the fun part—making these Fruity Pebbles Cheesecake Tacos! Follow these simple steps, and you’ll have a delightful dessert in no time.
Step 1: Prepare the Cream Cheese Mixture
Start by grabbing a mixing bowl and your softened cream cheese. Using an electric mixer, beat the cream cheese until it’s smooth and creamy. This step is crucial because it sets the foundation for your cheesecake filling. You want it to be as smooth as a cloud, so take your time here!
Step 2: Add Sweetness and Flavor
Next, it’s time to sweeten things up! Add the powdered sugar and vanilla extract to the cream cheese. Mix everything together until it’s well combined. The powdered sugar will dissolve beautifully, creating a luscious mixture that smells heavenly. Trust me, you’ll want to sneak a taste at this point!
Step 3: Fold in the Whipped Cream
Now, let’s lighten things up! Gently fold in the whipped cream using a spatula. Be careful not to overmix; you want to keep that airy texture. This step is like adding a fluffy cloud to your cheesecake, making it light and dreamy. It’s all about that perfect balance!
Step 4: Incorporate Fruity Pebbles
Time to add the star of the show—Fruity Pebbles! Carefully mix in the cereal, ensuring it’s evenly distributed throughout the cheesecake mixture. The colorful crunch will add a fun texture and flavor that makes these tacos truly special. Just imagine that delightful crunch with every bite!
Step 5: Fill the Taco Shells
Now comes the fun part—filling the taco shells! Take each taco shell and spoon in the cheesecake mixture. Don’t be shy; fill them generously! You want each taco to be bursting with flavor. If you’re using mini taco shells, just adjust the amount accordingly. They’re perfect for little hands!
Step 6: Add Toppings and Chill
Finally, it’s time to add some pizzazz! Top each filled taco with additional Fruity Pebbles and a sprinkle of colorful sprinkles if you like. This adds a festive touch that’s sure to impress. Once you’ve topped them off, place the tacos in the refrigerator for at least 30 minutes. This chilling time allows the flavors to meld beautifully, making each bite even more delicious!
Tips for Success
- Make sure your cream cheese is softened for easy mixing.
- Use a spatula to gently fold in the whipped cream for a light texture.
- Don’t overfill the taco shells; leave a little room for toppings.
- Chill the tacos for at least 30 minutes to enhance the flavors.
- Get creative with toppings—try different cereals or fruits!
Equipment Needed
- Mixing bowl: A large bowl for combining ingredients. A sturdy plastic or glass bowl works well.
- Electric mixer: For beating the cream cheese. A whisk can be used if you prefer a workout!
- Spatula: Essential for folding in whipped cream and filling taco shells.
- Refrigerator: To chill the tacos before serving. A cooler can work in a pinch!
Variations
- Chocolate Lovers: Swap out some of the cream cheese for chocolate cream cheese for a rich twist.
- Fruit Fiesta: Add fresh fruit like strawberries or bananas to the cheesecake mixture for a fruity burst.
- Nutty Crunch: Mix in chopped nuts like almonds or pecans for an extra crunch and flavor.
- Vegan Option: Use vegan cream cheese and coconut whipped cream for a plant-based version.
- Gluten-Free: Ensure you use gluten-free taco shells and check all other ingredients for gluten content.
Serving Suggestions
- Pair these tacos with a scoop of vanilla ice cream for an indulgent treat.
- Serve alongside fresh fruit like strawberries or blueberries for a refreshing contrast.
- For drinks, consider a fruity punch or sparkling lemonade to complement the flavors.
- Present on a colorful platter to showcase the vibrant colors of the Fruity Pebbles.
FAQs about Fruity Pebbles Cheesecake Tacos
Can I make Fruity Pebbles Cheesecake Tacos ahead of time?
Absolutely! These tacos can be made a few hours in advance. Just fill the taco shells and chill them in the refrigerator until you’re ready to serve. This makes them a perfect dessert for parties or family gatherings!
What can I substitute for cream cheese?
If you’re looking for a lighter option, you can use Greek yogurt instead of cream cheese. It will give you a tangy flavor while still keeping that creamy texture. Just make sure to adjust the sweetness accordingly!
How do I store leftover Fruity Pebbles Cheesecake Tacos?
Store any leftovers in an airtight container in the refrigerator. They’re best enjoyed within a couple of days, as the taco shells may get soggy over time. But trust me, they’ll be gone before you know it!
Can I use other cereals instead of Fruity Pebbles?
Definitely! Feel free to experiment with other cereals like Cocoa Pebbles, Rice Krispies, or even granola. Each will give a unique twist to your cheesecake tacos while keeping that fun crunch!
Are these tacos suitable for kids?
Final Thoughts
Creating Fruity Pebbles Cheesecake Tacos is more than just whipping up a dessert; it’s about bringing joy to your kitchen and smiles to your family’s faces. The vibrant colors and delightful crunch make every bite a celebration. Whether it’s a busy weeknight or a special occasion, these tacos are a sweet escape from the ordinary. Plus, they’re so easy to make that you’ll find yourself wanting to share them with friends and loved ones. So, roll up your sleeves, gather your ingredients, and let the fun begin! You won’t regret it!
PrintFruity Pebbles Cheesecake Tacos: A Sweet Twist Awaits!

Fruity Pebbles Cheesecake Tacos are a delightful dessert that combines the flavors of cheesecake with the fun crunch of Fruity Pebbles cereal, all wrapped in a taco shell.
- Prep Time: 15 minutes
- Cook Time: 0 minutes
- Total Time: 45 minutes (including chilling time)
- Yield: 12 tacos 1x
- Category: Dessert
- Method: No-bake
- Cuisine: American
- Diet: Vegetarian
Ingredients
- 1 package of taco shells
- 8 oz cream cheese, softened
- 1/2 cup powdered sugar
- 1 tsp vanilla extract
- 1 cup whipped cream
- 1 cup Fruity Pebbles cereal
- Optional: sprinkles for garnish
Instructions
- In a mixing bowl, beat the softened cream cheese until smooth.
- Add the powdered sugar and vanilla extract, mixing until well combined.
- Fold in the whipped cream gently until the mixture is light and fluffy.
- Carefully mix in the Fruity Pebbles cereal.
- Fill each taco shell with the cheesecake mixture.
- Top with additional Fruity Pebbles and sprinkles if desired.
- Chill in the refrigerator for at least 30 minutes before serving.
Notes
- For a gluten-free option, use gluten-free taco shells.
- These tacos can be made a few hours in advance for convenience.
- Feel free to customize with other cereals or toppings.
Nutrition
- Serving Size: 1 taco
- Calories: 150
- Sugar: 10g
- Sodium: 100mg
- Fat: 7g
- Saturated Fat: 4g
- Unsaturated Fat: 2g
- Trans Fat: 0g
- Carbohydrates: 20g
- Fiber: 0g
- Protein: 2g
- Cholesterol: 30mg