
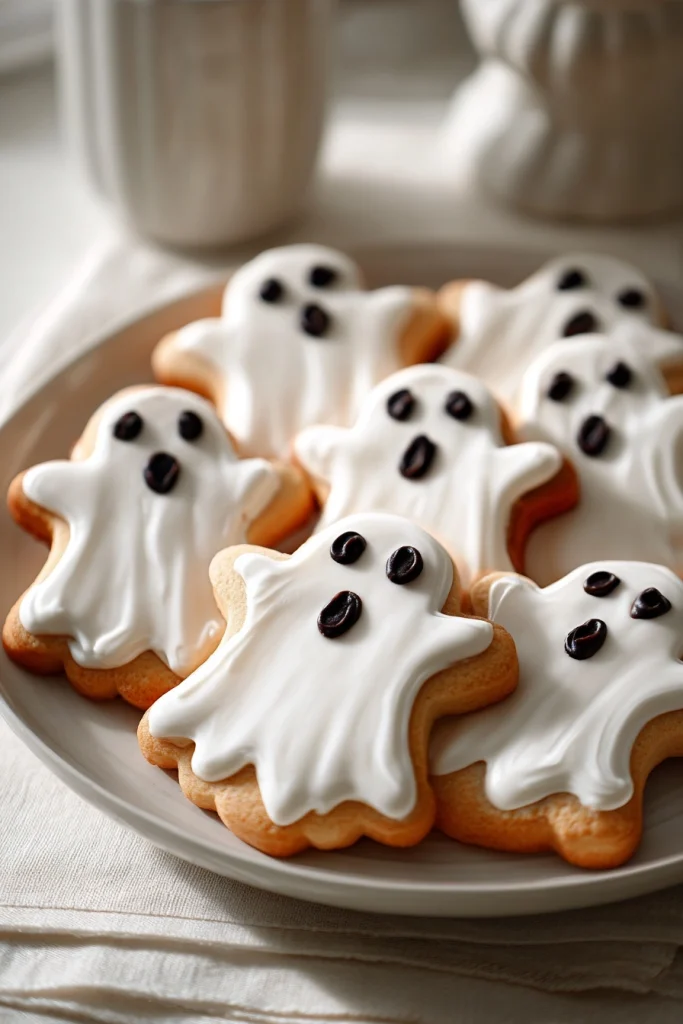
Introduction to Ghost Cookies
As the leaves turn and the air gets crisp, I can’t help but get excited about Halloween. One of my favorite ways to celebrate is by baking ghost cookies. These delightful treats are not just spooky; they’re soft, chewy, and oh-so-delicious! Perfect for busy moms like us, this recipe is a quick solution for whipping up something festive without spending hours in the kitchen. Plus, they’re a hit with kids and adults alike, making them a fantastic way to impress your loved ones. Let’s dive into the fun of creating these ghostly delights!
Why You’ll Love This Ghost Cookies
These ghost cookies are a dream come true for busy schedules. They come together in just 20 minutes, making them perfect for last-minute Halloween gatherings. The soft, chewy texture paired with the sweet white chocolate chips creates a flavor explosion that will have everyone coming back for more. Plus, the fun ghostly appearance adds a touch of whimsy to your dessert table, making them a delightful treat for all ages!
Ingredients for Ghost Cookies
Gathering the right ingredients is the first step to creating these delightful ghost cookies. Here’s what you’ll need:
- Unsalted butter: This is the base of your cookies, providing richness and a soft texture. Make sure it’s softened for easy mixing.
- Granulated sugar: This sweetener helps create that lovely chewy texture while adding sweetness to the cookies.
- Brown sugar: Packed with moisture, brown sugar gives your cookies a deeper flavor and a hint of caramel.
- Large eggs: Eggs bind the ingredients together and add moisture, making your cookies soft and fluffy.
- Vanilla extract: A splash of vanilla enhances the overall flavor, making each bite taste even more delightful.
- All-purpose flour: The main structure of your cookies, flour gives them body and helps them hold their shape.
- Baking soda: This leavening agent helps the cookies rise, creating that perfect soft and chewy texture.
- Salt: Just a pinch balances the sweetness and enhances the flavors of the other ingredients.
- White chocolate chips: These sweet morsels add a creamy flavor that pairs beautifully with the cookie base.
- Mini chocolate chips: These are for the ghostly eyes! They add a fun touch and a bit of extra chocolatey goodness.
For those looking to mix things up, consider adding a sprinkle of cinnamon for warmth or using dark chocolate chips instead of white for a richer flavor. You can find the exact quantities for each ingredient at the bottom of the article, ready for printing!
How to Make Ghost Cookies
Now that we have our ingredients ready, let’s dive into the fun part: making these ghost cookies! Follow these simple steps, and you’ll have a batch of spooky treats in no time.
Step 1: Preheat the Oven
First things first, preheat your oven to 350°F (175°C). Preheating is crucial because it ensures that your cookies bake evenly. If the oven isn’t hot enough, your cookies might spread too much or not rise properly. Trust me, a well-preheated oven is the secret to perfect ghost cookies!
Step 2: Cream the Butter and Sugars
In a large bowl, cream together the softened butter, granulated sugar, and brown sugar until smooth. This process is essential for achieving that soft, chewy texture we all love. The sugars will aerate the butter, creating tiny air pockets that help the cookies rise. It’s like giving your cookies a little boost!
Step 3: Add Eggs and Vanilla
Next, add the eggs and vanilla extract to the mixture. Beat them in until well combined. Eggs add moisture and richness, while vanilla enhances the flavor, making each bite a little slice of heaven. You’ll notice the batter becoming creamy and luscious—just what we want!
Step 4: Combine Dry Ingredients
In a separate bowl, whisk together the all-purpose flour, baking soda, and salt. Mixing these dry ingredients separately helps distribute the baking soda evenly, ensuring your cookies rise perfectly. It’s a small step that makes a big difference!
Step 5: Mix Wet and Dry Ingredients
Now, gradually add the dry ingredients to the wet mixture. Stir gently until just combined. Be careful not to overmix; we want to keep that soft texture. Overmixing can lead to tough cookies, and nobody wants that! Just mix until you see no more flour.
Step 6: Fold in White Chocolate Chips
Time to fold in those delicious white chocolate chips! These sweet morsels add a creamy flavor that pairs beautifully with the cookie base. Gently mix them in, ensuring they’re evenly distributed throughout the dough. This is where the magic happens!
Step 7: Shape the Cookies
Using a spoon or cookie scoop, drop spoonfuls of dough onto a baking sheet lined with parchment paper. Leave some space between each cookie, as they will spread while baking. Aim for a fun, ghostly shape—don’t worry about perfection; a little irregularity adds to their charm!
Step 8: Bake the Cookies
Pop the baking sheet into the oven and bake for 10-12 minutes. Keep an eye on them! You’ll know they’re done when the edges are lightly golden. The centers might look a bit soft, but they’ll firm up as they cool. Trust your instincts; you want them to be soft and chewy!
Step 9: Add Chocolate Chip Eyes
Once you take the cookies out of the oven, let them cool for a few minutes. Then, while they’re still warm, gently press mini chocolate chips into the top for the ghostly eyes. This is where the fun really begins! Get creative with the placement—each cookie can have its own personality!
Step 10: Cool and Enjoy
Finally, transfer the cookies to a wire rack to cool completely. The anticipation of tasting these ghost cookies is almost as sweet as the cookies themselves! Once they’re cool, gather your family and friends, and enjoy these delightful treats together. Happy Halloween baking!
Tips for Success
- Chill the dough for 30 minutes before baking for a thicker cookie.
- Use a cookie scoop for uniform sizes and even baking.
- Don’t skip the parchment paper; it prevents sticking and makes cleanup a breeze.
- Experiment with different chocolate chips for unique flavors.
- Store cookies in an airtight container to keep them fresh and chewy.
Equipment Needed
- Mixing bowls: A large bowl for mixing and a smaller one for dry ingredients. Any size will do!
- Electric mixer: A hand mixer works great, but a whisk and some elbow grease can do the job too.
- Baking sheet: Use any flat baking tray; just line it with parchment paper.
- Cookie scoop or spoon: A scoop ensures even sizes, but a regular spoon works just fine.
- Wire rack: For cooling cookies; a plate can work in a pinch!
Variations of Ghost Cookies
- Chocolate Ghost Cookies: Swap half of the all-purpose flour for cocoa powder to create a rich chocolate version. These will be a hit with chocolate lovers!
- Gluten-Free Ghost Cookies: Use a gluten-free all-purpose flour blend to make these cookies suitable for those with gluten sensitivities. They’ll still be soft and delicious!
- Nutty Ghost Cookies: Add 1/2 cup of chopped nuts, like walnuts or pecans, for a delightful crunch and extra flavor.
- Spiced Ghost Cookies: Incorporate a teaspoon of cinnamon or pumpkin spice into the dry ingredients for a warm, autumnal twist.
- Vegan Ghost Cookies: Replace the eggs with flaxseed meal (1 tablespoon flaxseed meal + 2.5 tablespoons water per egg) and use a plant-based butter alternative for a vegan-friendly treat.
Serving Suggestions for Ghost Cookies
- Pair these ghost cookies with a glass of cold milk for a classic treat.
- Serve them alongside a warm cup of apple cider for a cozy autumn vibe.
- Arrange cookies on a spooky-themed platter for a festive presentation.
- Consider adding a scoop of vanilla ice cream on the side for an indulgent dessert.
FAQs about Ghost Cookies
As you embark on your ghost cookie baking adventure, you might have a few questions. Here are some common queries I’ve encountered, along with helpful answers to guide you through the process.
Can I freeze ghost cookies?
Absolutely! These spooky cookies freeze beautifully. Just place them in an airtight container or freezer bag, and they’ll stay fresh for up to three months. When you’re ready to enjoy them, simply thaw at room temperature.
What can I use instead of white chocolate chips?
If you’re not a fan of white chocolate, feel free to swap in dark chocolate chips or even butterscotch chips for a different flavor profile. The key is to choose something you love!
How do I make ghost cookies less sweet?
To tone down the sweetness, you can reduce the amount of granulated sugar or brown sugar by a quarter. You can also use semi-sweet chocolate chips instead of white chocolate for a more balanced flavor.
Can I add food coloring to the dough?
Yes! If you want to add a fun twist, consider using food coloring to tint the dough. Just a few drops can create a spooky effect, especially for Halloween parties!
What’s the best way to store ghost cookies?
Store your ghost cookies in an airtight container at room temperature. They’ll stay fresh and chewy for up to a week. If you want to keep them longer, consider freezing them!
Final Thoughts
Baking ghost cookies is more than just a fun Halloween activity; it’s a chance to create lasting memories with your loved ones. The joy of watching the cookies transform from dough to delightful treats is truly magical. Each bite brings a smile, and the laughter shared while decorating adds to the experience. Whether you’re hosting a spooky gathering or simply enjoying a cozy night in, these ghost cookies are sure to bring warmth and happiness to your home. So, roll up your sleeves, gather your family, and let the spirit of Halloween fill your kitchen with love and laughter!
PrintGhost cookies: Discover the secret to spooky treats!

Ghost cookies are delightful and spooky treats perfect for Halloween, featuring a soft and chewy texture with a fun ghostly appearance.
- Prep Time: 20 minutes
- Cook Time: 12 minutes
- Total Time: 32 minutes
- Yield: 24 cookies 1x
- Category: Dessert
- Method: Baking
- Cuisine: American
- Diet: Vegetarian
Ingredients
- 1 cup unsalted butter, softened
- 1 cup granulated sugar
- 1 cup brown sugar, packed
- 2 large eggs
- 1 teaspoon vanilla extract
- 3 cups all-purpose flour
- 1 teaspoon baking soda
- 1/2 teaspoon salt
- 1 cup white chocolate chips
- 1/2 cup mini chocolate chips (for eyes)
Instructions
- Preheat your oven to 350°F (175°C).
- In a large bowl, cream together the softened butter, granulated sugar, and brown sugar until smooth.
- Add the eggs and vanilla extract, mixing until well combined.
- In a separate bowl, whisk together the flour, baking soda, and salt.
- Gradually add the dry ingredients to the wet ingredients, mixing until just combined.
- Fold in the white chocolate chips.
- Drop spoonfuls of dough onto a baking sheet lined with parchment paper.
- Bake for 10-12 minutes or until the edges are lightly golden.
- Remove from the oven and let cool slightly before adding mini chocolate chips for eyes.
- Allow cookies to cool completely on a wire rack.
Notes
- For a more intense flavor, chill the dough for 30 minutes before baking.
- Store cookies in an airtight container for up to a week.
- Feel free to decorate with icing for added ghostly effects.
Nutrition
- Serving Size: 1 cookie
- Calories: 150
- Sugar: 10g
- Sodium: 100mg
- Fat: 7g
- Saturated Fat: 4g
- Unsaturated Fat: 2g
- Trans Fat: 0g
- Carbohydrates: 20g
- Fiber: 1g
- Protein: 2g
- Cholesterol: 30mg