
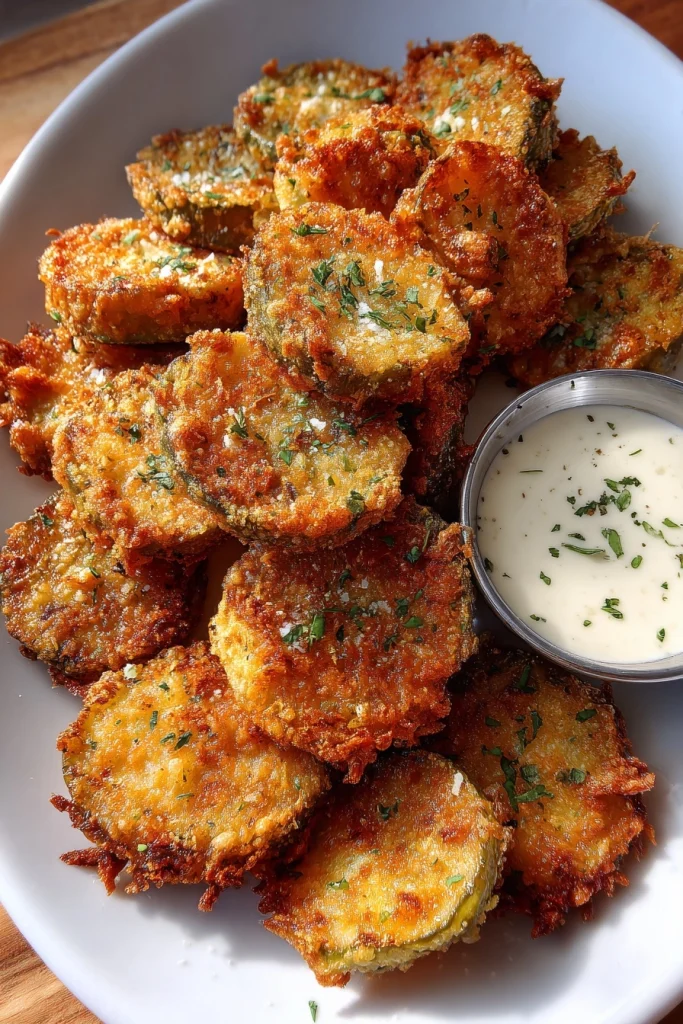
Introduction to Fried Pickles
Hey there, fellow food lovers! If you’re anything like me, you know that life can get pretty hectic. Between juggling work, family, and everything in between, finding time to whip up something delicious can feel like a challenge. That’s where these crispy, mouthwatering fried pickles come in! They’re not just a quick solution for a busy day; they’re also a delightful way to impress your loved ones. Imagine the smiles on their faces as they crunch into these golden bites of joy. Trust me, once you try this recipe, you’ll be hooked!
Why You’ll Love This Fried Pickles
These fried pickles are a game-changer for busy moms and professionals alike. They’re quick to prepare, taking just 25 minutes from start to finish. Plus, the crispy texture and zesty flavor make them a hit at any gathering. Whether you’re looking for a fun snack or an appetizer that wows, these fried pickles deliver on taste and ease. You’ll find yourself making them again and again!
Ingredients for Fried Pickles
Let’s gather our ingredients for these delightful fried pickles! Each component plays a crucial role in creating that perfect crunch and flavor. Here’s what you’ll need:
- Dill pickles: The star of the show! Choose your favorite brand or even homemade for a personal touch.
- All-purpose flour: This helps create a crispy coating. You can substitute with gluten-free flour if needed.
- Cornmeal: Adds a delightful crunch and a hint of sweetness to the batter.
- Garlic powder: A must for flavor! It gives a savory kick that complements the pickles beautifully.
- Paprika: This adds a touch of color and a mild smokiness. Feel free to use smoked paprika for an extra depth of flavor.
- Salt: Essential for enhancing all the flavors. Adjust to your taste preference.
- Black pepper: A little heat goes a long way! It balances the flavors perfectly.
- Eggs: These help the coating stick to the pickles, creating that irresistible crunch.
- Buttermilk: Adds moisture and a slight tang, making the batter rich and flavorful.
- Oil for frying: Choose a high smoke point oil like vegetable or canola oil for the best results.
For exact measurements, check the bottom of the article where you can find everything listed for easy printing. Now that we have our ingredients ready, let’s dive into the fun part—making these fried pickles!
How to Make Fried Pickles
Step 1: Prepare the Pickles
First things first, let’s get those pickles ready! Drain the jar of dill pickles and place them on a plate lined with paper towels. This step is crucial because excess moisture can make your fried pickles soggy. Pat them dry gently with another paper towel. The drier they are, the better they’ll fry. Trust me, this little trick makes a world of difference!
Step 2: Mix the Dry Ingredients
Now, let’s create that delicious coating! In a large mixing bowl, combine the all-purpose flour, cornmeal, garlic powder, paprika, salt, and black pepper. Whisk them together until they’re well blended. This mixture is what gives your fried pickles that irresistible crunch and flavor. Feel free to adjust the spices to suit your taste. A little extra paprika can add a nice kick!
Step 3: Prepare the Wet Mixture
Next up, it’s time for the wet ingredients! In a separate bowl, crack the eggs and pour in the buttermilk. Whisk them together until they’re smooth and well combined. This mixture will help the dry coating stick to the pickles, ensuring that every bite is packed with flavor. If you don’t have buttermilk, regular milk works too, but the tanginess adds a special touch!
Step 4: Coat the Pickles
Let’s get those pickles dressed! Take each pickle slice and dip it into the egg mixture, making sure it’s fully coated. Then, transfer it to the dry mixture, pressing gently to ensure it sticks. Repeat this process for all the pickles. For an extra crunch, consider double dipping—back into the egg and then the flour mixture. It’s a little extra work, but oh-so-worth it!
Step 5: Heat the Oil
Now, let’s talk oil! In a deep fryer or a large pot, heat your oil to 350°F (175°C). Use a thermometer to check the temperature; this is key for perfectly fried pickles. If the oil isn’t hot enough, your pickles will absorb too much oil and become greasy. If it’s too hot, they’ll burn. Patience is a virtue here, so let the oil heat up properly!
Step 6: Fry the Pickles
It’s frying time! Carefully add the coated pickles to the hot oil in batches. Don’t overcrowd the pot; this can lower the oil temperature. Fry them for about 2-3 minutes, or until they turn a beautiful golden brown. Keep an eye on them, as they can go from perfect to overdone quickly. Once they’re done, use a slotted spoon to remove them from the oil.
Step 7: Drain and Serve
Finally, let’s get those fried pickles ready to serve! Place the fried pickles on a plate lined with paper towels to drain any excess oil. Serve them hot with your favorite dipping sauce—ranch dressing is a classic choice! The crispy exterior and tangy pickle flavor are sure to be a hit. Enjoy every crunchy bite!
Tips for Success
- Make sure to dry the pickles thoroughly for the best crunch.
- Experiment with spices in the dry mixture to find your perfect flavor.
- Use a thermometer to ensure the oil is at the right temperature.
- Fry in small batches to maintain oil temperature and achieve even cooking.
- Serve immediately for the crispiest experience!
Equipment Needed
- Deep fryer or large pot: A deep fryer is ideal, but a heavy pot works too.
- Thermometer: Essential for checking oil temperature; a candy thermometer is a great alternative.
- Slotted spoon: Perfect for removing fried pickles from the oil.
- Mixing bowls: You’ll need two for the wet and dry mixtures.
- Paper towels: Handy for draining excess oil after frying.
Variations of Fried Pickles
- Spicy Fried Pickles: Add cayenne pepper or hot sauce to the dry mixture for a fiery kick that spice lovers will adore.
- Cheesy Fried Pickles: Mix in some grated Parmesan or cheddar cheese into the dry coating for a cheesy twist that adds flavor and richness.
- Gluten-Free Fried Pickles: Substitute all-purpose flour with a gluten-free flour blend to make this recipe suitable for those with gluten sensitivities.
- Sweet Pickles: Use sweet pickles instead of dill for a unique flavor profile that balances sweetness with crunch.
- Herbed Fried Pickles: Incorporate dried herbs like dill, oregano, or thyme into the dry mixture for an aromatic touch that elevates the taste.
Serving Suggestions for Fried Pickles
- Dipping sauces: Serve with ranch dressing, spicy mayo, or a tangy barbecue sauce for extra flavor.
- Side dishes: Pair with a fresh salad or coleslaw to balance the richness of the fried pickles.
- Presentation: Arrange on a colorful platter with fresh herbs for a vibrant touch.
FAQs about Fried Pickles
Can I use other types of pickles for this recipe? Absolutely! While dill pickles are traditional, you can experiment with bread and butter pickles or even spicy pickles for a different flavor profile. Each type will bring its unique twist to the dish.
How do I store leftover fried pickles? If you have any leftovers (which is rare!), store them in an airtight container in the fridge. They’re best enjoyed fresh, but you can reheat them in the oven to regain some of that crispy texture.
Can I make fried pickles ahead of time? While it’s best to fry them fresh, you can prepare the pickles and the batter ahead of time. Just coat them and fry when you’re ready to serve. This way, you can enjoy them hot and crispy!
What dipping sauces pair well with fried pickles? Fried pickles are delicious with a variety of dipping sauces! Ranch dressing is a classic choice, but you can also try spicy mayo, garlic aioli, or even a tangy barbecue sauce for a fun twist.
Are fried pickles healthy? While fried pickles are a tasty treat, they are best enjoyed in moderation. They do contain some calories and sodium, so consider them an indulgent snack rather than a regular part of your diet. Enjoy them guilt-free on special occasions!
Final Thoughts
Making fried pickles is more than just a cooking task; it’s a delightful experience that brings joy to your kitchen. The crispy crunch and tangy flavor create a perfect harmony that can brighten any day. Whether you’re serving them at a family gathering or enjoying them as a late-night snack, these fried pickles are sure to impress. Plus, the smiles on your loved ones’ faces as they savor each bite make all the effort worthwhile. So, roll up your sleeves, gather your ingredients, and let the frying fun begin. You won’t regret it!
PrintFried Pickles: Discover the Best Recipe Today!
Crispy and delicious fried pickles, perfect as a snack or appetizer.
- Prep Time: 15 minutes
- Cook Time: 10 minutes
- Total Time: 25 minutes
- Yield: 4 servings 1x
- Category: Appetizer
- Method: Frying
- Cuisine: American
- Diet: Vegetarian
Ingredients
- 1 jar of dill pickles
- 1 cup all-purpose flour
- 1 cup cornmeal
- 1 teaspoon garlic powder
- 1 teaspoon paprika
- 1/2 teaspoon salt
- 1/2 teaspoon black pepper
- 2 large eggs
- 1 cup buttermilk
- Oil for frying
Instructions
- Drain the pickles and pat them dry with paper towels.
- In a bowl, mix the flour, cornmeal, garlic powder, paprika, salt, and black pepper.
- In another bowl, whisk together the eggs and buttermilk.
- Dip each pickle slice into the egg mixture, then coat with the flour mixture.
- Heat oil in a deep fryer or large pot to 350°F (175°C).
- Fry the pickles in batches until golden brown, about 2-3 minutes.
- Remove and drain on paper towels.
- Serve hot with your favorite dipping sauce.
Notes
- For extra crunch, double dip the pickles in the egg and flour mixture.
- Adjust the spices according to your taste preference.
- These can be made gluten-free by using a gluten-free flour blend.
Nutrition
- Serving Size: 5 pickles
- Calories: 250
- Sugar: 2g
- Sodium: 800mg
- Fat: 15g
- Saturated Fat: 2g
- Unsaturated Fat: 10g
- Trans Fat: 0g
- Carbohydrates: 30g
- Fiber: 2g
- Protein: 5g
- Cholesterol: 50mg