
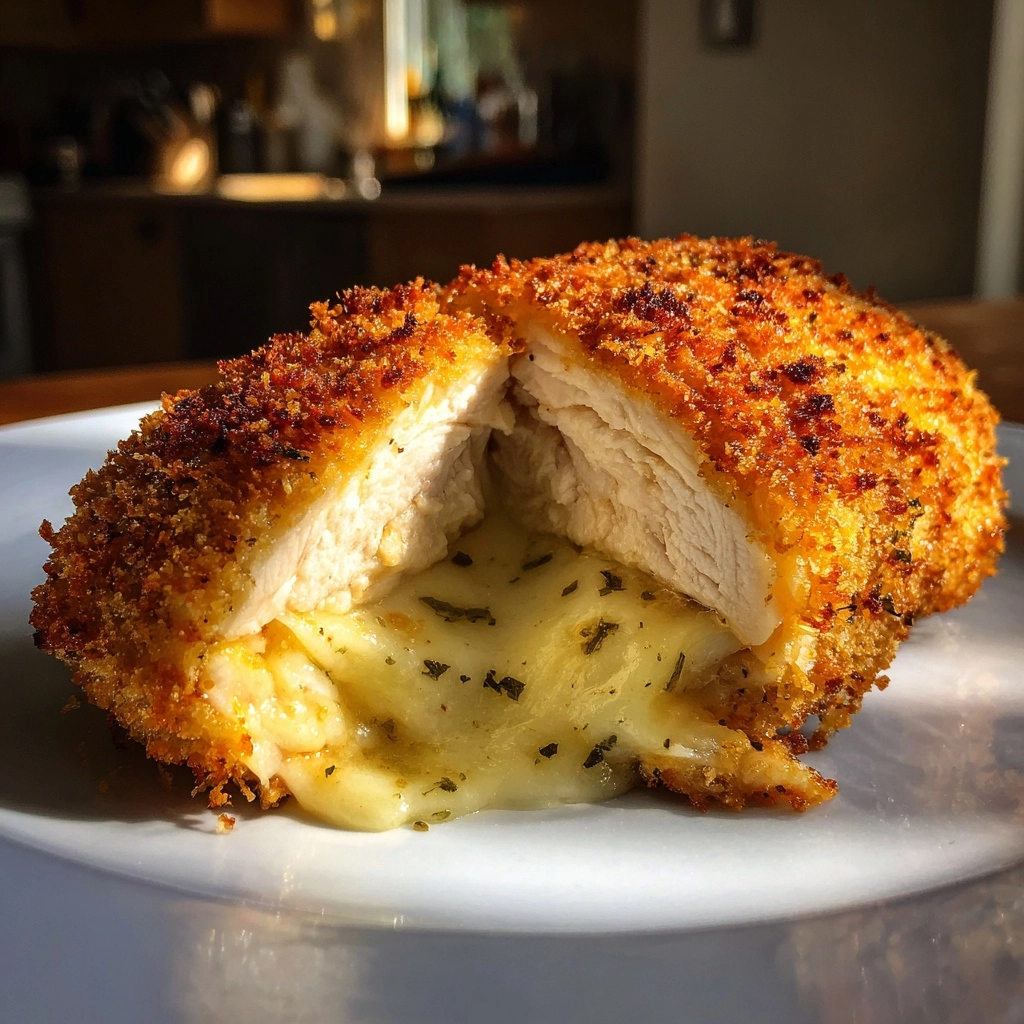
Introduction to Easy Chicken Kiev: Crispy, Juicy, and Filled with Flavor
Welcome to the world of Easy Chicken Kiev: Crispy, Juicy, and Filled with Flavor! As a busy mom, I know how challenging it can be to whip up a meal that pleases everyone. This dish is a delightful solution for those hectic weeknights when you want something special without spending hours in the kitchen. Imagine golden-brown chicken, bursting with a flavorful herb butter that melts in your mouth. It’s not just a meal; it’s a way to impress your loved ones and create lasting memories around the dinner table. Let’s dive into this culinary adventure together!
Why You’ll Love This Easy Chicken Kiev: Crispy, Juicy, and Filled with Flavor
This Easy Chicken Kiev is a lifesaver for busy evenings. It’s quick to prepare, taking just about 50 minutes from start to finish. The crispy coating gives way to juicy chicken, while the herb butter adds a burst of flavor that will have everyone asking for seconds. Plus, it’s a dish that looks impressive, making it perfect for family dinners or entertaining friends. You’ll love how simple it is to create such a delightful meal!
Ingredients for Easy Chicken Kiev: Crispy, Juicy, and Filled with Flavor
Gathering the right ingredients is the first step to creating this mouthwatering Easy Chicken Kiev. Here’s what you’ll need:
- Boneless, skinless chicken breasts: The star of the show! They’re tender and easy to work with, making them perfect for this dish.
- Unsalted butter: This is the base for our herb butter. Using unsalted allows you to control the seasoning better.
- Garlic: Minced garlic adds a punch of flavor that complements the herbs beautifully.
- Fresh parsley: This herb brings a bright, fresh taste to the butter, enhancing the overall flavor profile.
- Fresh dill: Dill adds a unique, aromatic touch that pairs wonderfully with chicken.
- Lemon juice: A splash of lemon juice brightens the herb butter, balancing the richness of the butter.
- All-purpose flour: This is used for coating the chicken, helping to create that crispy exterior.
- Large eggs: Beaten eggs act as a binding agent, ensuring the breadcrumbs stick to the chicken.
- Breadcrumbs: They provide the crunchy coating that makes this dish so satisfying.
- Salt and pepper: Essential for seasoning, these simple ingredients elevate the flavors of the dish.
Feel free to get creative! You can add other herbs like thyme or chives to the butter for a twist. If you’re short on time, pre-made herb butter can be a great shortcut. For those with dietary restrictions, gluten-free breadcrumbs work just as well. Remember, the exact quantities are listed at the bottom of the article for easy printing!
How to Make Easy Chicken Kiev: Crispy, Juicy, and Filled with Flavor
Step 1: Preheat the Oven
First things first, preheat your oven to 375°F (190°C). Preheating is crucial because it ensures that the chicken cooks evenly. A hot oven helps achieve that golden-brown crust we all love while keeping the inside juicy. Trust me, you don’t want to skip this step!
Step 2: Prepare the Herb Butter
Next, let’s whip up that delicious herb butter. In a bowl, combine the softened butter, minced garlic, chopped parsley, dill, lemon juice, salt, and pepper. Mix until everything is well blended. The garlic adds a savory kick, while the herbs bring freshness. The lemon juice brightens the flavor, making it irresistible!
Step 3: Pound the Chicken
Now, it’s time to pound the chicken. Place each chicken breast between two sheets of plastic wrap. Using a meat mallet or rolling pin, gently pound the chicken to an even thickness, about half an inch. This technique helps the chicken cook evenly and stay tender. Plus, it’s a great way to relieve stress after a long day!
Step 4: Fill and Seal the Chicken
Take a generous portion of the herb butter and place it in the center of each chicken breast. Fold the sides over to seal the butter inside. Make sure to press the edges firmly to prevent any leaks during cooking. This step is key to keeping that flavorful butter intact!
Step 5: Coat the Chicken
Now, let’s get that crispy coating going! Start by coating each chicken breast in flour, shaking off any excess. Then, dip it into the beaten eggs, allowing the excess to drip off. Finally, roll the chicken in breadcrumbs until fully coated. This three-step process creates a crunchy exterior that’s simply divine!
Step 6: Fry the Chicken
Heat oil in a skillet over medium heat. Once hot, carefully add the chicken breasts. Fry them for about 3-4 minutes on each side, or until they’re golden brown. This step adds a beautiful color and flavor. Just be sure not to overcrowd the pan; you want each piece to have room to crisp up!
Step 7: Bake the Chicken
After frying, transfer the chicken to a baking dish. Pop it in the preheated oven and bake for 15-20 minutes. This ensures the chicken is cooked through while keeping it juicy. You’ll know it’s done when the internal temperature reaches 165°F (75°C). Your kitchen will smell heavenly!
Step 8: Rest Before Serving
Finally, let the chicken rest for a few minutes before serving. This step is essential for allowing the juices to redistribute, making each bite tender and flavorful. Trust me, the wait will be worth it when you take that first delicious bite!
Tips for Success
- Use a meat thermometer to check for doneness; it should read 165°F (75°C).
- Don’t rush the resting time; it helps keep the chicken juicy.
- For extra crunch, double-coat the chicken in breadcrumbs.
- Experiment with different herbs in the butter for unique flavors.
- Make a larger batch and freeze some for quick meals later!
Equipment Needed for Easy Chicken Kiev: Crispy, Juicy, and Filled with Flavor
- Meat mallet or rolling pin: For pounding the chicken. A heavy skillet can work in a pinch.
- Mixing bowls: Essential for combining the herb butter and coating ingredients.
- Skillet: For frying the chicken. A non-stick pan makes cleanup easier.
- Baking dish: To finish cooking the chicken in the oven.
- Meat thermometer: To ensure the chicken is cooked perfectly. A simple knife can also help check doneness.
Variations of Easy Chicken Kiev: Crispy, Juicy, and Filled with Flavor
- Cheesy Chicken Kiev: Add a slice of mozzarella or cheddar cheese to the herb butter for a gooey, cheesy surprise inside.
- Spicy Chicken Kiev: Mix in some crushed red pepper flakes or a dash of hot sauce into the herb butter for a kick of heat.
- Mushroom Chicken Kiev: Sauté finely chopped mushrooms and mix them into the herb butter for an earthy flavor boost.
- Gluten-Free Option: Substitute regular breadcrumbs with gluten-free breadcrumbs or crushed gluten-free crackers for a safe alternative.
- Herb Variations: Experiment with different herbs like thyme, basil, or tarragon in the butter for unique flavor profiles.
Serving Suggestions for Easy Chicken Kiev: Crispy, Juicy, and Filled with Flavor
- Mashed potatoes: Creamy mashed potatoes make a perfect side, soaking up the delicious herb butter.
- Fresh salad: A light, crisp salad adds a refreshing contrast to the rich chicken.
- White wine: Pair with a chilled glass of white wine for a delightful dining experience.
- Garnish: Sprinkle fresh herbs on top for a pop of color and flavor.
FAQs about Easy Chicken Kiev: Crispy, Juicy, and Filled with Flavor
Can I make Easy Chicken Kiev ahead of time?
Absolutely! You can prepare the chicken and fill it with herb butter in advance. Just coat it and store it in the fridge until you’re ready to fry and bake. This makes it a fantastic option for meal prep!
What can I serve with Easy Chicken Kiev?
This dish pairs wonderfully with creamy mashed potatoes, a fresh salad, or even roasted vegetables. The herb butter complements these sides beautifully, creating a well-rounded meal.
Can I freeze Easy Chicken Kiev?
Yes, you can freeze the uncooked chicken after coating it. Just wrap each piece tightly in plastic wrap and store in an airtight container. When you’re ready to cook, thaw it in the fridge overnight before frying and baking.
How do I know when the chicken is cooked through?
The best way to check is by using a meat thermometer. The internal temperature should reach 165°F (75°C). If you don’t have one, cut into the thickest part of the chicken; the juices should run clear, and the meat should no longer be pink.
Can I use chicken thighs instead of breasts?
Definitely! Chicken thighs will give you a richer flavor and remain juicy. Just adjust the cooking time slightly, as thighs may take a bit longer to cook through.
Final Thoughts on Easy Chicken Kiev: Crispy, Juicy, and Filled with Flavor
Making Easy Chicken Kiev is more than just cooking; it’s about creating moments that bring joy to your family. The crispy, golden exterior gives way to a burst of herb-infused butter that dances on your taste buds. Each bite is a reminder that delicious meals don’t have to be complicated. Whether it’s a busy weeknight or a special gathering, this dish is sure to impress. I hope you enjoy every moment spent preparing and sharing this delightful recipe with your loved ones. Happy cooking, and may your kitchen always be filled with laughter and love!
Easy Chicken Kiev: Discover Crispy, Juicy Flavor Today!

Easy Chicken Kiev is a delicious dish featuring crispy, golden-brown chicken filled with a flavorful herb butter, making it juicy and satisfying.
- Prep Time: 20 minutes
- Cook Time: 30 minutes
- Total Time: 50 minutes
- Yield: 4 servings 1x
- Category: Main Course
- Method: Baking and Frying
- Cuisine: Eastern European
- Diet: Gluten Free
Ingredients
- 4 boneless, skinless chicken breasts
- 1/2 cup unsalted butter, softened
- 2 cloves garlic, minced
- 1/4 cup fresh parsley, chopped
- 1/4 cup fresh dill, chopped
- 1 teaspoon lemon juice
- 1 cup all-purpose flour
- 2 large eggs, beaten
- 2 cups breadcrumbs
- Salt and pepper to taste
Instructions
- Preheat your oven to 375°F (190°C).
- In a bowl, mix the softened butter, garlic, parsley, dill, lemon juice, salt, and pepper until well combined.
- Place the chicken breasts between two sheets of plastic wrap and pound them to an even thickness.
- Take a portion of the herb butter and place it in the center of each chicken breast, folding the sides over to seal.
- Coat each chicken breast in flour, then dip in the beaten eggs, and finally coat with breadcrumbs.
- Heat oil in a skillet over medium heat and fry the chicken until golden brown on both sides.
- Transfer the chicken to a baking dish and bake in the preheated oven for 15-20 minutes, or until cooked through.
- Let rest for a few minutes before serving.
Notes
- For extra flavor, you can add other herbs to the butter mixture.
- Make sure the chicken is sealed well to prevent the butter from leaking out during cooking.
- Serve with a side of mashed potatoes or a fresh salad.
Nutrition
- Serving Size: 1 chicken breast
- Calories: 450
- Sugar: 1g
- Sodium: 600mg
- Fat: 30g
- Saturated Fat: 15g
- Unsaturated Fat: 10g
- Trans Fat: 0g
- Carbohydrates: 30g
- Fiber: 2g
- Protein: 25g
- Cholesterol: 100mg