
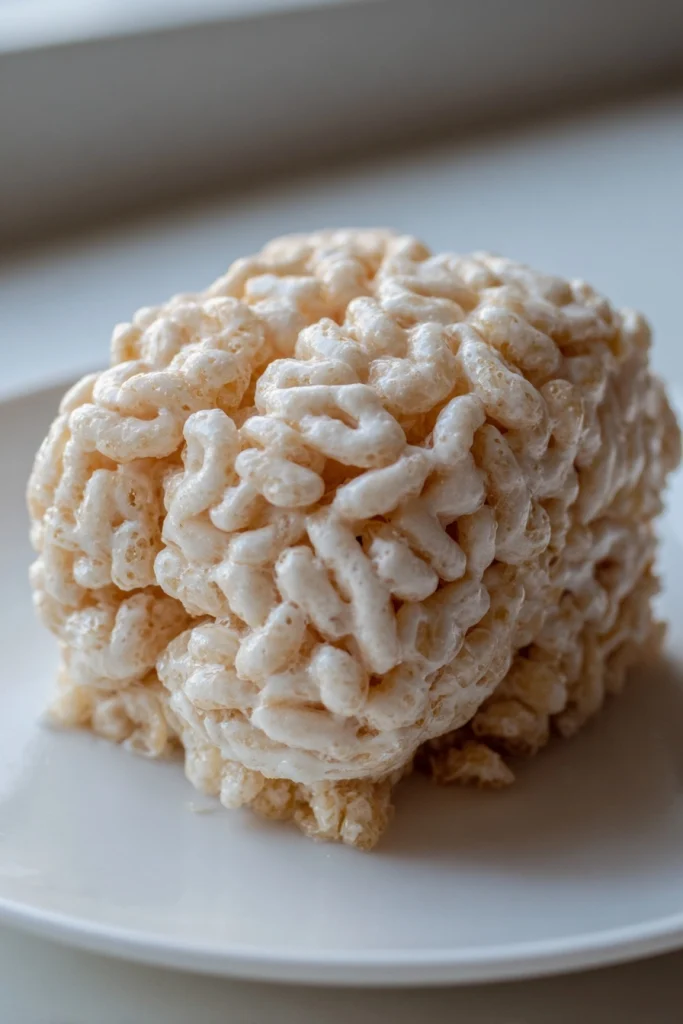
Introduction to Marshmallow Rice Krispies Halloween Brains
As the leaves turn and the air gets crisp, Halloween creeps up on us, bringing a delightful mix of fun and fright. If you’re like me, juggling a busy schedule while trying to create memorable moments for your family, these Marshmallow Rice Krispies Halloween Brains are a perfect solution! They’re quick to whip up, and the kids will love their spooky shape. Plus, they make for a fantastic treat at any Halloween party. So, let’s dive into this deliciously eerie recipe that’s sure to impress your loved ones and bring smiles all around!
Why You’ll Love This Marshmallow Rice Krispies Halloween Brains
These Marshmallow Rice Krispies Halloween Brains are not just fun to make; they’re a breeze! With just a few ingredients and minimal time, you can create a treat that’s both delicious and visually captivating. The kids will be thrilled to help, making it a perfect family activity. Plus, they’re a sweet way to celebrate the spooky season without the stress of complicated recipes. Who doesn’t love a quick, tasty treat?
Ingredients for Marshmallow Rice Krispies Halloween Brains
To create these delightful Marshmallow Rice Krispies Halloween Brains, you’ll need a handful of simple ingredients that you probably already have in your pantry. Here’s what you’ll need:
- Butter: This adds richness and helps bind the ingredients together. I prefer unsalted for better control over the flavor.
- Marshmallows: The star of the show! They provide that gooey sweetness we all love. Mini marshmallows work just as well if you have them on hand.
- Rice Krispies cereal: This gives the treats their signature crunch. You can substitute with any puffed rice cereal if needed.
- Red food coloring: A little splash of color transforms these treats into spooky brains. Feel free to adjust the amount for a more intense hue!
- Chocolate syrup: Perfect for drizzling on top, adding a delicious finishing touch. You can also use melted chocolate for a richer flavor.
For those looking to get creative, consider adding edible glitter for a magical effect or using different colors of food coloring to match your Halloween theme. The exact quantities for each ingredient are listed at the bottom of the article, ready for printing!
How to Make Marshmallow Rice Krispies Halloween Brains
Now that we have our ingredients ready, let’s get to the fun part—making these spooky treats! Follow these simple steps, and you’ll have a batch of Marshmallow Rice Krispies Halloween Brains that will wow your family and friends.
Step 1: Melt the Butter
Start by melting the butter in a large saucepan over low heat. Stir it gently until it’s completely melted. This step is crucial, as it creates a smooth base for our marshmallows. Keep an eye on it; we don’t want it to brown!
Step 2: Add the Marshmallows
Once the butter is melted, add the marshmallows to the pan. Stir continuously until they’re fully melted and combined with the butter. The mixture should be gooey and smooth, like a sweet cloud. This is where the magic begins!
Step 3: Mix in the Rice Krispies
Remove the saucepan from heat and add the Rice Krispies cereal. Gently fold the cereal into the marshmallow mixture until every piece is well coated. This step is like giving each Rice Krispie a warm hug! Make sure not to crush the cereal too much; we want that delightful crunch.
Step 4: Color the Mixture
Now, divide the mixture into two bowls. In one bowl, add a few drops of red food coloring and mix well. This will give us that spooky brain color! Feel free to add more coloring if you want a deeper shade. It’s all about making it as creepy as you like!
Step 5: Mold the Treats
Next, grease a brain-shaped mold with a bit of butter or cooking spray. This will help the treats pop out easily later. Start pressing the plain Rice Krispies mixture into one side of the mold, then layer the red mixture on top. Alternate between the two colors until the mold is full. It’s like creating a delicious work of art!
Step 6: Cool and Set
Let the treats cool and set for about 30 minutes. This is the hardest part—waiting! But trust me, it’s worth it. Once they’re set, they’ll hold their shape beautifully. You can even pop them in the fridge for a quicker cool-down.
Step 7: Decorate with Chocolate Syrup
Finally, it’s time to get creative! Carefully remove the treats from the mold. Drizzle chocolate syrup over the top for a gory effect. You can also use melted chocolate for a richer taste. This final touch makes them look extra spooky and delicious!
Tips for Success
- Use fresh marshmallows for the best texture and flavor.
- Don’t rush the melting process; low heat is key to avoid burning.
- Grease your mold generously to ensure easy removal.
- For a fun twist, try adding sprinkles or edible eyes on top!
- Store leftovers in an airtight container to keep them fresh.
Equipment Needed
- Large saucepan: A non-stick pan works best for easy cleanup.
- Wooden spoon: Perfect for stirring; a silicone spatula is a great alternative.
- Brain-shaped mold: If you don’t have one, use a muffin tin for fun shapes.
- Measuring cups: Essential for accurate ingredient portions.
Variations
- Chocolate Rice Krispies: Swap out some of the Rice Krispies for chocolate-flavored cereal for a rich twist.
- Nut Butter Addition: Stir in a tablespoon of peanut or almond butter for added flavor and creaminess.
- Vegan Option: Use vegan butter and marshmallows to make these treats suitable for a plant-based diet.
- Gluten-Free Version: Ensure your Rice Krispies are labeled gluten-free for a safe treat for those with gluten sensitivities.
- Fruit Flavored: Add a few drops of flavored extracts like strawberry or raspberry to the marshmallow mixture for a fruity kick.
Serving Suggestions
- Pair these spooky treats with a glass of apple cider for a festive touch.
- Serve alongside Halloween-themed fruit skewers for a colorful platter.
- Display them on a spooky black platter, garnished with fake spider webs for added flair.
- Consider adding a side of gummy worms for a fun, creepy contrast!
FAQs about Marshmallow Rice Krispies Halloween Brains
Can I make these Marshmallow Rice Krispies Halloween Brains ahead of time?
Absolutely! You can prepare these spooky Rice Crispy treats a day or two in advance. Just store them in an airtight container to keep them fresh. They’ll be ready to impress your guests when Halloween arrives!
What if I don’t have a brain-shaped mold?
No worries! If you don’t have a brain-shaped mold, you can use a muffin tin or shape them by hand. Just form the mixture into brain-like shapes with your hands. It’s all about creativity!
How long do these treats last?
These Marshmallow Rice Krispies Halloween Brains can last up to a week when stored properly in an airtight container. They might get a bit stale, but they’ll still be delicious!
Can I use different colors for the food coloring?
Of course! Feel free to experiment with different colors to match your Halloween theme. Purple, green, or even black can add a fun twist to your spooky treats!
Are these treats suitable for kids with allergies?
It depends on the specific allergies. These treats are vegetarian but contain butter and marshmallows, which may not be suitable for everyone. Always check the labels and consider using allergy-friendly substitutes if needed.
Final Thoughts
Creating these Marshmallow Rice Krispies Halloween Brains is more than just making a treat; it’s about crafting memories with your loved ones. The joy on your kids’ faces as they help mold and decorate these spooky delights is priceless. Plus, the simplicity of the recipe means you can whip them up even on the busiest days. Whether you’re hosting a Halloween party or just looking for a fun family activity, these treats are sure to bring laughter and smiles. So, roll up your sleeves, get creative, and enjoy the sweet moments this Halloween season!
Marshmallow Rice Krispies Halloween Brains: Fun Treats Await!
Delicious and spooky marshmallow rice krispies treats shaped like brains, perfect for Halloween parties.
- Prep Time: 15 minutes
- Cook Time: 10 minutes
- Total Time: 25 minutes
- Yield: 12 servings 1x
- Category: Dessert
- Method: No-Bake
- Cuisine: American
- Diet: Vegetarian
Ingredients
- 3 tablespoons butter
- 1 package (10 oz) marshmallows
- 6 cups Rice Krispies cereal
- Red food coloring
- Chocolate syrup (for decoration)
Instructions
- Melt the butter in a large saucepan over low heat.
- Add the marshmallows and stir until completely melted.
- Remove from heat and add the Rice Krispies cereal, mixing until well coated.
- Divide the mixture into two bowls. Add red food coloring to one bowl and mix well.
- Grease a brain-shaped mold and press the mixture into the mold, alternating between the plain and colored mixture.
- Let the treats cool and set for about 30 minutes.
- Once set, remove from the mold and drizzle with chocolate syrup for decoration.
Notes
- For a more intense color, add more red food coloring.
- These treats can be stored in an airtight container for up to a week.
- Consider using edible glitter for an extra spooky effect.
Nutrition
- Serving Size: 1 treat
- Calories: 150
- Sugar: 10g
- Sodium: 50mg
- Fat: 5g
- Saturated Fat: 3g
- Unsaturated Fat: 2g
- Trans Fat: 0g
- Carbohydrates: 22g
- Fiber: 0g
- Protein: 1g
- Cholesterol: 10mg