
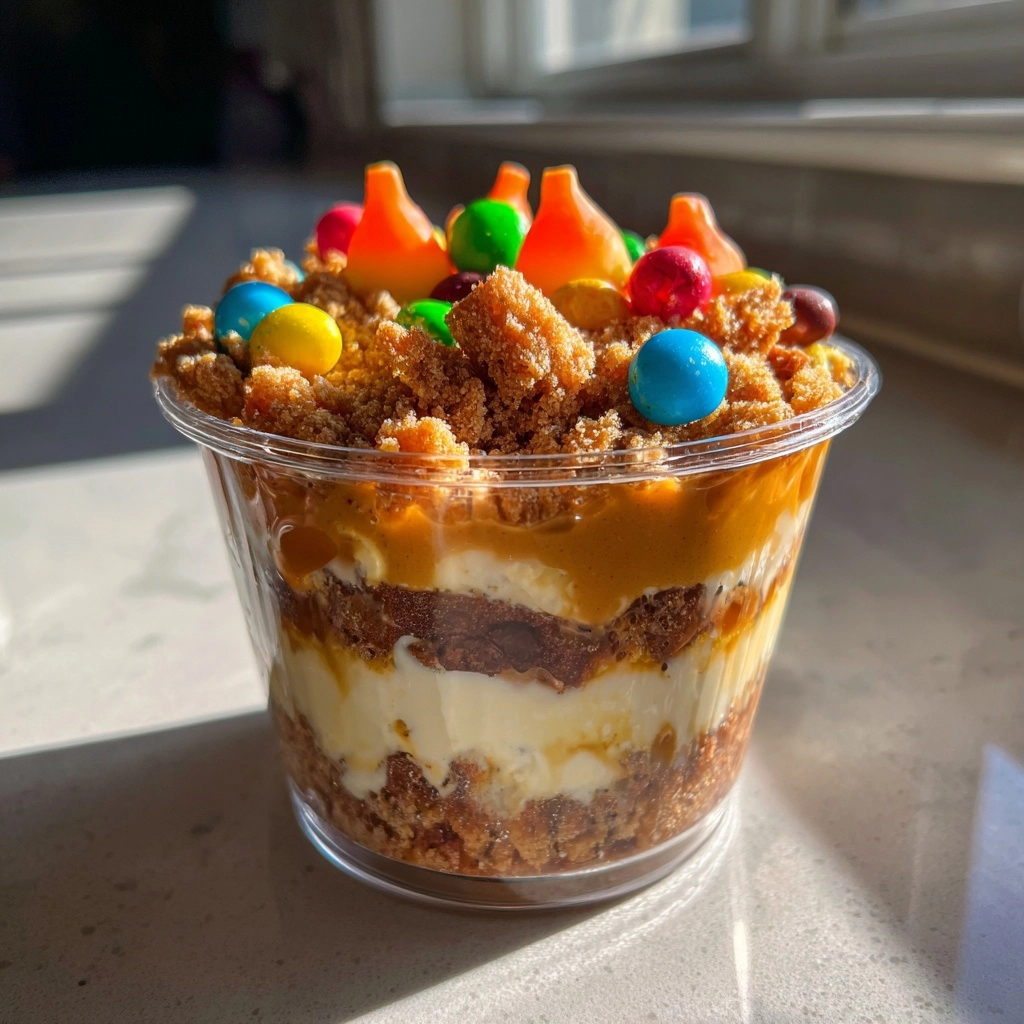
Introduction to Pumpkin Patch Dirt Cups
As the leaves turn and the air gets crisp, I find myself craving cozy treats that bring a smile to my kids’ faces. That’s where these delightful pumpkin patch dirt cups come in! They’re not just a dessert; they’re a fun, interactive experience that transforms a busy day into a memorable one. With layers of creamy chocolate pudding, crunchy cookie “dirt,” and playful gummy worms, these cups are sure to impress your little ones. Plus, they’re quick to whip up, making them the perfect solution for busy moms like us who want to add a sprinkle of joy to our fall festivities!
Why You’ll Love This Pumpkin Patch Dirt Cups
These pumpkin patch dirt cups are a breeze to make, taking just 15 minutes of your time. They’re a hit with kids, combining fun and flavor in every bite. Plus, you can prepare them ahead of time, making them a lifesaver for busy days. The best part? They’re customizable! You can switch up the flavors or decorations to suit your family’s tastes, ensuring everyone leaves the table happy.
Ingredients for Pumpkin Patch Dirt Cups
Gathering the right ingredients is half the fun! Here’s what you’ll need to create these delightful pumpkin patch dirt cups:
- Chocolate pudding mix: This is the creamy base that brings richness to your cups. You can also use vanilla pudding for a different twist!
- Milk: Essential for preparing the pudding. Any type of milk works, so feel free to use almond or oat milk for a dairy-free option.
- Crushed chocolate sandwich cookies: These mimic the look of dirt and add a satisfying crunch. You can substitute with graham crackers for a lighter flavor.
- Gummy worms: These playful candies add a fun touch that kids adore. You can swap them out for gummy spiders or other Halloween-themed treats for a spooky vibe!
- Small plastic pumpkins: These are perfect for decoration, making your cups look festive and inviting. You can find them at craft stores or online.
For exact quantities, check the bottom of the article where you can find a printable version of the recipe!
How to Make Pumpkin Patch Dirt Cups
Creating these pumpkin patch dirt cups is as easy as pie! Follow these simple steps, and you’ll have a delightful dessert that your kids will love. Let’s dive in!
Step 1: Prepare the Pudding
Start by mixing the chocolate pudding according to the package instructions. Combine the pudding mix with milk in a bowl. Whisk it until smooth and creamy. This step is quick, taking just a few minutes. The rich chocolate flavor will set the stage for your delicious cups!
Step 2: Layer the Pudding
Once your pudding is ready, grab your cups or small bowls. Spoon a generous layer of pudding into the bottom of each cup. This creamy base is the foundation of your pumpkin patch dirt cups. Make sure to leave enough room for the fun layers to come!
Step 3: Add the Dirt Layer
Next, it’s time to create the “dirt” layer. Sprinkle a layer of crushed chocolate sandwich cookies on top of the pudding. This adds a delightful crunch and gives the appearance of dirt. The contrast between the creamy pudding and crunchy cookies is simply irresistible!
Step 4: Insert the Gummy Worms
Now for the fun part! Take your gummy worms and gently insert them into the dirt layer. Let them peek out as if they’re crawling through the soil. This playful touch will make your pumpkin patch dirt cups even more exciting for the kids. They’ll love the surprise of finding worms in their dessert!
Step 5: Decorate with Pumpkins
To make your cups festive, top each one with a small plastic pumpkin. This adds a charming fall touch and makes your dessert look extra special. The bright colors of the pumpkins will catch the eye and bring a smile to everyone’s face!
Step 6: Repeat Layers
Continue layering the pudding, crushed cookies, and gummy worms until your cups are filled. You can create as many layers as you like, but I recommend keeping it to two or three for balance. Each layer adds to the fun and flavor, making every bite a delightful surprise!
Step 7: Chill Before Serving
Finally, place your completed cups in the refrigerator for at least 30 minutes. Chilling allows the flavors to meld and makes the pudding even more refreshing. Plus, it gives you a moment to relax before the kids dive into their tasty treats!
How to Make Pumpkin Patch Dirt Cups
Creating these pumpkin patch dirt cups is as easy as pie! Follow these simple steps, and you’ll have a delightful dessert that your kids will love. Let’s dive in!
Step 1: Prepare the Pudding
Start by mixing the chocolate pudding according to the package instructions. Combine the pudding mix with milk in a bowl. Whisk it until smooth and creamy. This step is quick, taking just a few minutes. The rich chocolate flavor will set the stage for your delicious cups!
Step 2: Layer the Pudding
Once your pudding is ready, grab your cups or small bowls. Spoon a generous layer of pudding into the bottom of each cup. This creamy base is the foundation of your pumpkin patch dirt cups. Make sure to leave enough room for the fun layers to come!
Step 3: Add the Dirt Layer
Next, it’s time to create the “dirt” layer. Sprinkle a layer of crushed chocolate sandwich cookies on top of the pudding. This adds a delightful crunch and gives the appearance of dirt. The contrast between the creamy pudding and crunchy cookies is simply irresistible!
Step 4: Insert the Gummy Worms
Now for the fun part! Take your gummy worms and gently insert them into the dirt layer. Let them peek out as if they’re crawling through the soil. This playful touch will make your pumpkin patch dirt cups even more exciting for the kids. They’ll love the surprise of finding worms in their dessert!
Step 5: Decorate with Pumpkins
To make your cups festive, top each one with a small plastic pumpkin. This adds a charming fall touch and makes your dessert look extra special. The bright colors of the pumpkins will catch the eye and bring a smile to everyone’s face!
Step 6: Repeat Layers
Continue layering the pudding, crushed cookies, and gummy worms until your cups are filled. You can create as many layers as you like, but I recommend keeping it to two or three for balance. Each layer adds to the fun and flavor, making every bite a delightful surprise!
Step 7: Chill Before Serving
Finally, place your completed cups in the refrigerator for at least 30 minutes. Chilling allows the flavors to meld and makes the pudding even more refreshing. Plus, it gives you a moment to relax before the kids dive into their tasty treats!
Tips for Success
- Use a whisk to mix the pudding for a smooth texture.
- Crush the cookies in a zip-top bag for less mess.
- Let the kids help with layering; it makes it more fun!
- For a healthier twist, try Greek yogurt instead of pudding.
- Chill the cups longer for a firmer texture if desired.
Equipment Needed
- Cups or small bowls: Use clear plastic cups for a fun presentation, or any small bowls you have on hand.
- Whisk: A whisk is great for mixing pudding, but a fork works too!
- Zip-top bags: Perfect for crushing cookies without the mess.
Variations
- For a fruity twist, substitute chocolate pudding with vanilla or banana pudding.
- Add a layer of whipped cream on top for extra creaminess and a delightful texture.
- Use crushed graham crackers instead of chocolate cookies for a lighter, less sweet option.
- Incorporate mini chocolate chips or sprinkles between layers for added fun and flavor.
- For a gluten-free version, choose gluten-free cookies and pudding mix.
Serving Suggestions
- Pair these pumpkin patch dirt cups with apple slices for a refreshing crunch.
- Serve with warm cider or hot chocolate to enhance the fall vibe.
- For a festive touch, arrange the cups on a colorful fall-themed platter.
- Consider adding a sprinkle of cinnamon on top for extra flavor.
FAQs about Pumpkin Patch Dirt Cups
As you embark on your pumpkin patch dirt cups adventure, you might have a few questions. Here are some common queries I’ve encountered, along with helpful answers!
Can I make pumpkin patch dirt cups in advance?
Absolutely! These cups can be prepared a day ahead. Just keep them covered in the fridge until you’re ready to serve. This makes them a perfect option for busy days!
What can I use instead of gummy worms?
If gummy worms aren’t your thing, feel free to swap them out for gummy spiders or even chocolate-covered raisins. The goal is to keep it fun and festive!
Can I use different flavors of pudding?
Yes! While chocolate pudding is a classic choice, vanilla or butterscotch pudding can add a delightful twist. Experiment with flavors to find your family’s favorite!
How can I make these cups healthier?
For a healthier version, consider using Greek yogurt instead of pudding. You can also add fresh fruit layers for added nutrition and flavor!
Are pumpkin patch dirt cups suitable for parties?
Definitely! These cups are a hit at parties, especially during Halloween or fall-themed gatherings. They’re easy to make and even easier to enjoy!
Final Thoughts
Making pumpkin patch dirt cups is more than just whipping up a dessert; it’s about creating joyful moments with your kids. As we gather around the table, laughter fills the air, and the excitement of digging into these fun treats brings us closer together. Each layer tells a story, from the creamy pudding to the crunchy cookie dirt. Plus, the smiles on my children’s faces when they discover the gummy worms are priceless! So, whether it’s a cozy family night or a festive gathering, these delightful cups are sure to sprinkle a little magic into your fall celebrations.
PrintPumpkin Patch Dirt Cups: A Fun Fall Treat for Kids!

Pumpkin Patch Dirt Cups are a fun and delicious fall treat that kids will love, featuring layers of chocolate pudding, crushed cookies, and gummy worms.
- Prep Time: 15 minutes
- Cook Time: 0 minutes
- Total Time: 30 minutes
- Yield: 4 servings 1x
- Category: Dessert
- Method: No-bake
- Cuisine: American
- Diet: Vegetarian
Ingredients
- 1 package of chocolate pudding mix
- 2 cups of milk
- 1 package of crushed chocolate sandwich cookies
- Gummy worms
- Small plastic pumpkins (for decoration)
Instructions
- Prepare the chocolate pudding according to the package instructions using the milk.
- In a cup or small bowl, layer the chocolate pudding at the bottom.
- Add a layer of crushed chocolate sandwich cookies on top of the pudding to resemble dirt.
- Insert gummy worms into the dirt layer for a fun effect.
- Top with a small plastic pumpkin for decoration.
- Repeat the layers until the cups are filled.
- Chill in the refrigerator for at least 30 minutes before serving.
Notes
- Feel free to use vanilla pudding for a different flavor.
- For a healthier option, consider using yogurt instead of pudding.
- These cups can be made a day in advance for convenience.
Nutrition
- Serving Size: 1 cup
- Calories: 250
- Sugar: 20g
- Sodium: 150mg
- Fat: 10g
- Saturated Fat: 5g
- Unsaturated Fat: 3g
- Trans Fat: 0g
- Carbohydrates: 35g
- Fiber: 2g
- Protein: 3g
- Cholesterol: 15mg