
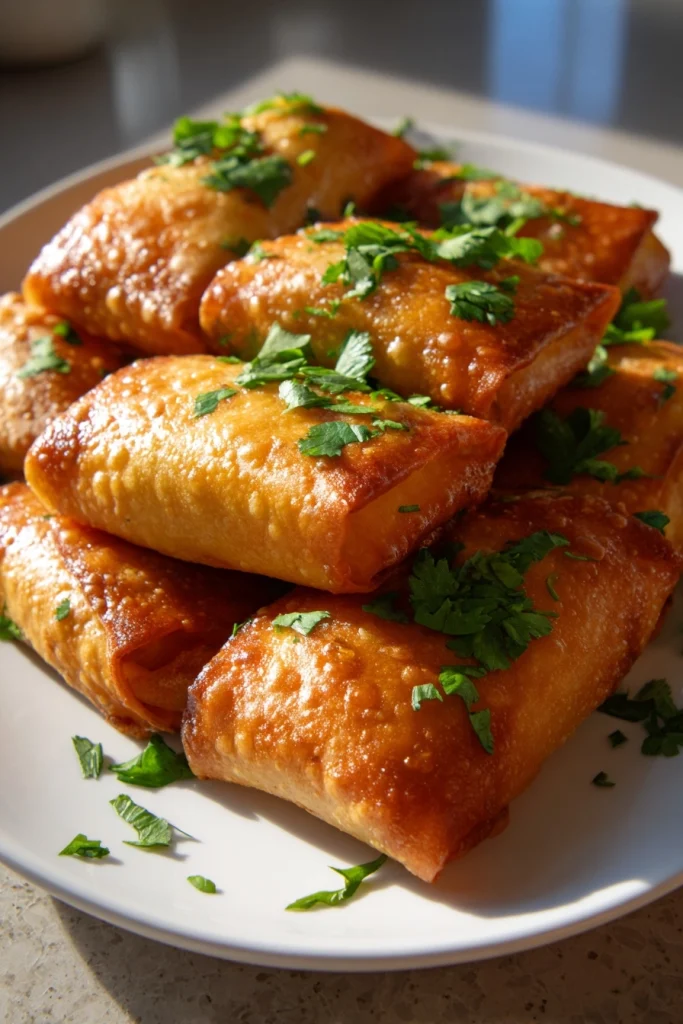
Introduction to Chicken Chimichangas
Welcome to the world of Chicken Chimichangas, where crispy goodness meets savory delight! As a busy mom, I know how challenging it can be to whip up a meal that pleases everyone. These chimichangas are not just a quick solution for a hectic day; they’re also a dish that will impress your loved ones. Imagine biting into a golden, crunchy shell filled with seasoned chicken and melted cheese. It’s comfort food at its finest, and trust me, your family will be asking for seconds!
Why You’ll Love This Chicken Chimichangas
These Chicken Chimichangas are a lifesaver for busy nights! They come together in just 30 minutes, making them perfect for those evenings when time is tight. The combination of crispy tortillas and flavorful filling creates a taste explosion that will have your family raving. Plus, they’re versatile! You can customize the filling to suit everyone’s preferences, ensuring that even the pickiest eaters will be satisfied.
Ingredients for Chicken Chimichangas
Gathering the right ingredients is key to making delicious Chicken Chimichangas. Here’s what you’ll need:
- Cooked chicken: Shredded chicken is the star of the show. You can use rotisserie chicken for a quick option or leftover chicken from a previous meal.
- Shredded cheese: Cheddar or a Mexican blend works beautifully. The cheese adds creaminess and flavor, melting perfectly inside the chimichanga.
- Refried beans: These add a hearty texture and help bind the filling together. You can use canned refried beans for convenience or make your own for a fresher taste.
- Salsa: A splash of salsa brings zest and moisture to the filling. Choose your favorite brand or make a homemade version for a personal touch.
- Cumin: This spice adds warmth and depth to the flavor profile. It’s a staple in Mexican cuisine and enhances the overall taste.
- Chili powder: A little kick goes a long way! Adjust the amount based on your family’s spice tolerance.
- Flour tortillas: Large tortillas are essential for wrapping up the filling. You can opt for whole wheat or gluten-free varieties if needed.
- Oil for frying: Choose a neutral oil like vegetable or canola for frying. If you prefer a healthier option, consider baking the chimichangas instead.
For exact measurements, check the bottom of the article where you can find everything listed for easy printing. Now that you have your ingredients ready, let’s dive into the fun part—making these scrumptious Chicken Chimichangas!
How to Make Chicken Chimichangas
Now that we have our ingredients ready, let’s get cooking! Making Chicken Chimichangas is a fun and straightforward process. Follow these steps, and you’ll have a delicious meal in no time!
Step 1: Prepare the Filling
Start by grabbing a large bowl. Combine the shredded chicken, cheese, refried beans, salsa, cumin, and chili powder. Mix everything together until well combined. This filling is the heart of your chimichangas, so make sure it’s flavorful. If you want to add a little extra zing, consider tossing in some chopped jalapeños or bell peppers!
Step 2: Warm the Tortillas
Next, it’s time to warm the tortillas. This step is crucial because it makes them pliable and easier to roll. You can do this in a microwave for about 20 seconds or on a skillet over low heat. Just be careful not to overheat them, or they might become too crispy to fold!
Step 3: Assemble the Chimichangas
Now comes the fun part—assembling the chimichangas! Lay a warm tortilla flat on a clean surface. Place a generous amount of the chicken mixture in the center. Fold the sides over the filling, then roll it up tightly from the bottom. Make sure the seam is on the bottom to keep everything secure. Repeat this process until all your filling is used up.
Step 4: Fry the Chimichangas
Heat oil in a deep skillet over medium heat. You want enough oil to submerge the chimichangas halfway. Once the oil is hot, carefully place the chimichangas seam side down. Fry them until they turn golden brown and crispy, about 3-4 minutes per side. Use tongs to flip them gently. This step is where the magic happens—watch them transform into crispy delights!
Step 5: Serve and Enjoy
Once they’re perfectly golden, remove the chimichangas from the oil and let them drain on paper towels. Serve them hot with your favorite salsa or guacamole on the side. Trust me, the first bite will be a flavor explosion! Enjoy your homemade Chicken Chimichangas with family and friends, and watch them disappear in no time!
Tips for Success
- Prep your ingredients ahead of time to save precious minutes during cooking.
- Don’t overfill the tortillas; a little goes a long way for easy rolling.
- Keep the oil at the right temperature; too hot can burn the chimichangas.
- For extra crunch, let the chimichangas rest on paper towels after frying.
- Experiment with different fillings to keep things exciting!
Equipment Needed
- Large bowl: For mixing the filling. A mixing spoon works well too.
- Skillet: A deep skillet is ideal for frying. A Dutch oven can be a great alternative.
- Tongs: Perfect for flipping the chimichangas. A slotted spoon can work in a pinch.
- Paper towels: Essential for draining excess oil after frying.
Variations
- Vegetarian Option: Swap the chicken for sautéed vegetables like bell peppers, zucchini, and mushrooms. Add black beans for extra protein.
- Spicy Kick: Mix in diced jalapeños or a splash of hot sauce to the filling for those who love heat.
- Cheesy Delight: Experiment with different cheeses like pepper jack or queso fresco for a unique flavor twist.
- Healthier Choice: Bake the chimichangas instead of frying. Brush them with a little olive oil and bake at 400°F until golden.
- Gluten-Free: Use gluten-free tortillas to make this dish suitable for those with gluten sensitivities.
Serving Suggestions
- Fresh Salsa: Serve with a side of chunky salsa for a refreshing contrast.
- Guacamole: Creamy guacamole adds a rich flavor that pairs perfectly.
- Mexican Rice: A side of fluffy Mexican rice complements the chimichangas beautifully.
- Cold Beverages: Pair with a chilled margarita or iced tea for a delightful meal.
- Garnish: Top with fresh cilantro or a squeeze of lime for a pop of color and flavor.
FAQs about Chicken Chimichangas
As you embark on your Chicken Chimichangas journey, you might have a few questions. Here are some common queries I’ve encountered, along with helpful answers!
Can I make Chicken Chimichangas ahead of time?
Absolutely! You can prepare the filling and assemble the chimichangas in advance. Just store them in the fridge until you’re ready to fry. This makes for a quick dinner option on busy nights!
What can I use instead of chicken?
If chicken isn’t your thing, feel free to swap it out! Ground beef, turkey, or even a mix of beans and veggies can create a delicious alternative. The beauty of Chicken Chimichangas is their versatility!
How do I store leftovers?
Leftover chimichangas can be stored in an airtight container in the fridge for up to three days. Reheat them in the oven for a crispy texture, or pop them in the microwave if you’re in a hurry.
Can I bake Chicken Chimichangas instead of frying?
Yes, you can! For a healthier option, brush the assembled chimichangas with olive oil and bake them at 400°F until golden brown. They may not be as crispy as fried ones, but they’ll still be delicious!
What sides pair well with Chicken Chimichangas?
These chimichangas are fantastic with sides like Mexican rice, refried beans, or a fresh salad. Don’t forget the salsa and guacamole for dipping!
Final Thoughts
Making Chicken Chimichangas is more than just cooking; it’s about creating joyful moments around the dinner table. The crispy exterior and flavorful filling bring smiles and satisfaction to my family, and I hope they do the same for yours. Whether it’s a busy weeknight or a special gathering, these chimichangas are sure to impress. Plus, the versatility of the recipe means you can adapt it to suit your family’s tastes. So roll up your sleeves, gather your loved ones, and enjoy the deliciousness that comes from your kitchen. Happy cooking!
PrintChicken Chimichangas: Discover the Ultimate Recipe Today!

Delicious and crispy chicken chimichangas filled with seasoned chicken and cheese, perfect for a satisfying meal.
- Prep Time: 15 minutes
- Cook Time: 15 minutes
- Total Time: 30 minutes
- Yield: 8 chimichangas 1x
- Category: Main Dish
- Method: Frying
- Cuisine: Mexican
- Diet: Gluten Free
Ingredients
- 2 cups cooked chicken, shredded
- 1 cup shredded cheese (cheddar or Mexican blend)
- 1/2 cup refried beans
- 1/2 cup salsa
- 1 teaspoon cumin
- 1 teaspoon chili powder
- 8 large flour tortillas
- Oil for frying
Instructions
- In a large bowl, combine shredded chicken, cheese, refried beans, salsa, cumin, and chili powder.
- Warm the tortillas slightly to make them pliable.
- Place a generous amount of the chicken mixture in the center of each tortilla.
- Fold the sides of the tortilla over the filling and roll it up tightly.
- Heat oil in a deep skillet over medium heat.
- Carefully place the chimichangas in the hot oil, seam side down, and fry until golden brown and crispy.
- Remove from oil and drain on paper towels.
- Serve hot with additional salsa or guacamole.
Notes
- For a healthier option, bake the chimichangas instead of frying them.
- Feel free to customize the filling with your favorite ingredients.
- Serve with sour cream or guacamole for added flavor.
Nutrition
- Serving Size: 1 chimichanga
- Calories: 350
- Sugar: 2g
- Sodium: 600mg
- Fat: 20g
- Saturated Fat: 8g
- Unsaturated Fat: 10g
- Trans Fat: 0g
- Carbohydrates: 30g
- Fiber: 3g
- Protein: 20g
- Cholesterol: 60mg